Posts tonen met het label winter. Alle posts tonen

zaterdag 22 oktober 2016

Selfish sewing part III: Fjara & Julia


(De foto's in deze post zijn weer gemaakt door Z.
Toen we de shoot deden genoten we van een Indian Summer (30 graden in september?!) Vandaar het belachelijk korte broekje... Sorry daarvoor ;) )

(De pictures are made by Z again.
When we had this shoot we were enjoying an Indian Summer (30 degrees Celsius in September?!). Hence the redicilous small shorts... Excuse me for that ;) )
 
Afgelopen zomer bracht Pienkel de Fjara Top uit. Er is een patroon voor dames en voor meisjes, ik kocht ze beiden. Alleen had ik toen geen tijd meer om er ook nog te maken. Eind van de zomer had ik weer wat tijd. Ik bedacht een manier zodat ik een Fjara top kon maken en er ook nog van kon genieten, ondanks dat de zomer voorbij was: Ik zou de Fjara combineren met een wijdvallend shirt.

Eerst maakte ik de Fjara...

Last summer Pienkel lounched the Fjara Top. There is a pattern for ladies and girls, I bought them both. I only didn't have the time to sew them up. At the end of the summer I did have time to sew again. And I did find a way to sew the Fjara, and enjoy it, while summer was almost gone: Combine the Fjara with a oversized shirt.

First I made the Fjara... 
 

Zoals belooft is het een makkelijk patroon en zit de Fjara zo in elkaar. Daar houd ik van. Ook de lengte en de slimfit zijn een shot in de roos. Ik maakte de Fjara nog iets langer door twee maten te combineren: Voor de breedte gebruikte ik maat 4 en voor de lengte maat 6.

The Fjara is an easy pattern and a quick sew. I love it. Also the length and slimfit are a hit. I made the Fjara a bit longer by combining two sizes: I used size 4 for the with of the top and size 6 for the length.


Toen begon de zoektocht naar een wijdvallend shirt. Ik kwam telkens terug bij de Julia Sweater van Compagnie-M. Maar ik vroeg me af of ik hiermee kon bereiken wat ik in mijn hoofd had. Ik zocht naar exemplaren van anderen en alleen haar exemplaar was zoals ik het wilde. Ik deed nog eens navraag in Naaikrans 2.0 en zij bevestigde dat wat ik wilde met de Julia kon.

Then the search for the oversized shirt started. I ended up with the Julia Sweater from Compagnie-M. Only I wasn't sure if I could make what I had in mind with the Julia. I searched for Julia's from others and found her Julia. This was exactly what I had in mind. I asked around at Naaikrans 2.0 and she confirmed what I wanted was possible with the Julia.


Ik maakte de Julia een maat groter dan ik volgens de matentabel nodig had. De stof die ik gebruikte had minder rek dan was voorgeschreven in het patroon. Daarom volgde ik de instructies voor minder rekbare stof. Omdat ik geen boordstof had, tekende ik de boorden aan de mouwen en panden aan, door deze te verlengen met de helft van de hoogte van de patroondelen van deze boorden. De hals werkte ik niet af. Ik probeerde nog langs de rand te stikken met een tweelingnaald maar haalde dit weer uit (tot 2x toe...) omdat ik het toch niet mooi vond.

I made the Julia one size to large according to the size chart. I uses fabric with less stretch than was instructed. So I followed the instructions for fabric with less stretch. Becouse I didn't had ribbing, I lenghted the sleeve and body pattern parts. I didn't finish the neckline. Altough, I stitched it twice with a twin needle, but I didn't like the result.


De zoomen van de mouwen en de panden werkte ik af met een tweelingnaald. De onderrand met een zwarte draad, de mouwen met de kleuren van de lipjes op het shirt.

I finished the sleeve and body hems with a twinneedle. The body hem with a black thread, the sleeve with threads that match the colors of the lips.


Nog een anekdote die ik met dit set heb meegemaakt...
Ik bracht Z en twee andere kindjes naar zwemles. Y zat ook in de auto. We waren bijna bij het zwembad toen Y zichzelf onder spuugde. Ik had geen reserve kleding mee... Bij het zwembad heb ik de 'grote' kinderen de kleedruimtes in gedirigeerd en moesten ze zichzelf omkleden. Met billendoekjes heb ik de auto wat opgeruimd en Y wat opgefrist. Y kreeg mijn Fjara aan (met een knoop in de nek, ging hij net niet over de grond) en een vestje van Z. Ik deed de Julia achterstevoren aan, zodat ik er nog redelijk zedelijk uit zag ;). Y vond het allemaal prima.

A little anecdote with this set...
I took Z and two friends to their swimming class. Y was in the car also. Almost at the swimmingpool, Y threw up. I didn't had a set of spare clothes with me.... At the swimmingpool I said to the 'big' kids they had to change clothes themselfs. I cleaned Y and the car up with baby wipes. Y did get my Fjara on (with a knot in the neck, the Fjara just didn't reach the ground) and a vest from Z. I put on my Julia backwards so it still did look decent ;). Y did'n mind at all.


Patronen:
Fjara Top - Pienkel
Julia Sweater - Compagnie-M

Stof:
Fjara: Zwarte tricot, Het Stoffen Hoedje
Julia: Sparkling Lips French Terry en Grey Melange French Terry, Stoffenfeest

Meer Compagnie-M en Pienkel door DeKaWear
Noa completes Y's summer wardrobe
2 Dyyni's for little Y

Meer Julia en Fjara door anderen
Querida: Twinning with the Fjara Tank, #KCW day1
Pienkel: All That Glitters - Julia Sweater

Patterns:
Fjara Top - Pienkel
Julia Sweater - Compagnie-M

Fabric:
Fjara: Black tricot, Het Stoffen Hoedje
Julia: Sparkling Lips French Terry and Grey Melange French Terry, Stoffenfeest

More Compagnie-M and Pienkel by DeKaWear
Noa completes Y's summer wardrobe
2 Dyyni's for little Y

More Julia and Fjara by others 
Querida: Twinning with the Fjara Tank, #KCW day1
Pienkel: All That Glitters - Julia Sweater


woensdag 17 februari 2016

Wat je voor je kinderen over hebt - The things we do for our kids

Ik kocht twee jaar terug spot goedkoop een lap zwarte ribfluweel en wist meteen wat ik daarvan zou maken: Een Bas voor S. Door allerlei oorzaken werd dit project steeds weer uitgesteld, maar nu is het er toch eindelijk van gekomen.

Two years ago I had a cheep buy with a piece of corduroy. I immediatly knew what I would make with it: A Bas for S.The project was delayed, but finished now eventually.


Ik ben fan van de Zonen09 patronen, ik houd van de retro-look in een modern jasje. Hoewel ik er nog niet veel genaaid heb (1 Jacob en 1 Bas) bewonder ik de patronen al langer. Het komt er gewoon niet altijd van ze te maken. Billie ligt inmiddels ook al te wachten, maar dan eigenlijk eerst voor de zussen.

I'm a fan of the Zonen09 patterns. I like the retro-look with a modern twist. Despite I didn't sew much of  them (1 Jacob and 1 Bas), I admire them for a while now. There are just always other projects that seem to get more priority. Billie is waiting next, but that would be for one of the sisters first, I think.


In tegenstelling tot Jacob, die zo in elkaar zat, vraagt Bas wat meer geduld. Ik moest zelfs rijgen! En, echt, daar heb ik sinds ik leerde naaien een bloedhekel aan. Maar je hebt veel over voor je kinderen, zelfs dit. Hoewel ik nu al bedenk hoe ik de volgende keer onder het rijgen uit kan komen. Ik had me voorgenomen alle stappen keurig te volgen, om zo tot een mooi eindresultaat te komen. En ik vind dat dat is gelukt.... OK ik had Bas even moeten strijken voor hij op de foto ging, maar daar kunnen jullie toch wel doorkijken hè? ;)

In contrast to Jacob, which was a quick sew, Bas needs more patience. I even had to thread (by hand)! And, I hated that when I learned to sew and I still do. This is one of those things you do for your kids, I guess. But I'm thinking of a way to skip the threading next time. I intended to follow the instructions step by step, to get a nice end result. I think this was succesful... OK, I had to iron Bas before taking pictures, but you can see trough that, don't you? 


Ik houd van de details, zoals de kruislinkse banden, die vanuit de zijnaden van de broek starten.

I realy love the details, like the crosswise shoulder belts, which start in the side seam.


Of de verborgen binnenzak! Noot aan mezelf: Let op dat je strijkijzer het klittenband niet raakt! (Tja...)

Or the hidden pocket! Note to myself: Don't toutch the velcro with the iron! 


Ook al wilde ik me braaf aan de instructies houden, toch is me dat niet helemaal gelukt. De tuinbroeksluiting die ik in gedachten had paste niet door de lusjes bovenaan de broek. Gelukkig dacht de mevrouw van de stoffenwinkel goed mee en zij kwam met bretelsluitingen. Prima! S kan de broek zo ook makkelijk zelf aan en uit krijgen. De tassenband die ik gebruikte is waarschijnlijk wat te dun, de schuifgesp kwam steeds naar beneden gezakt. Dit heb ik opgelost door hem met een klein draadje vast te zetten (jaja met-de-hand).

Altough I wanted to be nice and follow the instructions, I didn't fully follow them. The buckles I had in mind didn't go trough the loops on the dungaree. The lady in the fabric store was very helpful and came up with these suspender buckles. Great! S can put this dungarees on easialy. The tape I used for the shoulder belts is to thin, I guess. The slide came down while wearing this dungarees. So I secured the belt with a little stitch (yeah, by hand...).


S wilde zelf niet op de foto, maar het is me toch gelukt ;). Ik maakte de broek in maat 98 voor de breedte en 104 voor de lengte. Dat was met het overnemen van het patroon soms wat puzzelen, maar ik ben blij met deze keuze. Hij sluit netjes aan en geeft nog wat ruimte om te groeien. S is heel blij, hij noemt 'm zijn werkbroek. Misschien ga ik er toch nog een voor 'm maken. Eens kijken hoe ik onder het rijgen uit ga komen. En ik gebruik dan geen tassenband meer voor de schouderbanden.

S didn't want me to take a picture of him with his Bas, but I did ;). I made Bas in size 3 width and size 4 length. While transfering the pattern I had to puzzle a bit, but I'm happy with the result. It fits nice and has some room to grow. S is very happy with his Bas and calls it his working trousers. Maybe I make an other one for him. Just see how I can skip the threading... And I won't use this tape for the shoulder belts.


Patroon: Bas - Zonen09
Stof: tweedehandswinkel

Pattern: Bas - Zonen09
Fabric: Thriftstore

zaterdag 17 oktober 2015

Het eerste winterproject - The first winter project

De zomer is nu toch echt voorbij. Sinds een week lopen we nu in onze winterjassen en truien-met-lange-mouwen. We mogen niet klagen, de zomer duurde zowat tot begin oktober! Hopelijk komt hij weer snel terug, maar voorlopig zal het wel alleen maar kouder worden (ach, schaatsen en zo is ook heel leuk!). Ter voorbereiding op een gast post 'moest' ik een sweater maken. Bij het checken van de winterkleding in de kinderkasten, bleek S niet veel passende truien (en broeken) meer te hebben. En, op zoek naar heel wat anders, kwam ik een heerlijke, stoere, sweatstof tegen! Dit resulteerde in een Omni Tempore voor S.

Summer has gone for now. Since last week we're wearing our winterjackets and long sleeves. We can't complain, summer lasted 'till the start of October! I hope he will be back soon, but for now it will be getting colder (well, ice skating is nice too!). As a preperation on a guest post I 'had to' make a sweater. While checking the wardrobes of the kids for clothes for the colder days, I found out S didn't have much longsleeves nor sweaters (nor pants) anymore. While looking for something completly different, I found a nice, warm and sturdy jursey! This all resulted in a Omni Tempore for S.
 

Ik koos voor de sjaal-kraag en maakte maat 98. Hoewel hij wel 102 cm lang is, is dit toch 'zijn' maat. Hij past ook mooi, maar als hij gaat spelen heeft hij soms toch een blote rug. Misschien de volgende keer toch maar een maatje groter maken. Of wel deze breedte maar dan in de lengte een maatje groter....

I did choose the shawl collar and sewed up a size 3. Altough he is between a size 3 and 4 in length, size 3 is 'his' size. The Omni Tempore fits fine, but when he is playing you can see his back. Maybe I have to sew up a larger size next time. Or only lengthen the shirt...? 
 

Ondanks mijn zelfkritiek is S super blij met zijn trui. Zodra hij vanonder mijn naaimachine kwam gerold moest de trui aan. Waarschijnlijk om van mijn gezeur af te zijn (pas je wel op, ik wil er nog foto's van maken), moesten er ook direct foto's gemaakt worden. Gelukkig was het een van de laatste dagen met mooi weer, dus dat was zo gepiept.

Despite of my self-critisism S is very happy with his shirt. As soon as it came from under my sewing machine he had to put it on. And, probably to stop me from bothering him (watch it, I have to take pictures of it!), I immediatly had to take pictures. Luckaly it was one of the last warm days, so it didn't take long.
 

Stof: Stof met legerprint is een design van Poppy, gekocht bij La Vaca, Boordstof gekocht bij Sew Natural.

Fabric: Armyprint fabric is a design from Poppy, bought at La Vaca, Red fabric bought at Sew Natural.

woensdag 9 september 2015

Zonen09 Outfit

Binnenkort vieren mijn zusje en haar man hun bruiloft. Toen ik voor S de Jacob maakte, besloot ik voor hem en de grote zus een complete outfit te maken voor de bruiloft. De Jacob zou gecombineerd worden met een Ethan shirt. De stof voor dit shirt werd een ontwerp van Zonen09: Stickly Rockers. Vandaar dat de complete outfit een beetje een Zonen09 outfit is geworden.

In a few weeks my sister and her husband celebrate their wedding. When sewing the Jacob for S I decided to make S and his big sister a outfit for the wedding. The Jacob should be combinded with a Ethan shirt. The fabric for this shirt became Sticly Rockers, a design by Zonen09. That's why the outfit became a little bit a Zonen09 outfit.


For the record: Ik had deze blouse dus netjes gestreken, alvorens er foto's gemaakt gingen worden. Maar S besloot dat zijn eerste pose een gehurkte pose zou zijn. Schattig hoor, maar wel meteen de blouse in de kreukels natuurlijk...

For the record: I did iron the shirt before the photoshoot. I didn't count on S who thought it would be nice to squat for his first pose of the shoot. Adorable, but it wrinkled the shirt of course...


Ik maakte een maat 3 voor de 3,5 jarige. Voor de mouwen en de panden gebruikte ik de een na langste maat van het patroon. De mouwen hadden misschien nog wel een maat (één inch) langer gemogen. Maar aan de andere kant zijn ze nu precies lang genoeg. De manchetknopen van blousejes gaan bij S nooit dicht. Het past wel (net) maar we hebben er gewoon allebei het geduld niet voor denk ik :).

I sewed up a size 3 for our 3,5 year old. I used the second longest size for the sleeves and the body. I think I could use the longest size (1 inch taller). On the other hand, the sleeves are exactly long enough now. The buttons on the cuffs never close when S wears them. It does fit (just), but we both don't have the patience for it, I guess... ;)


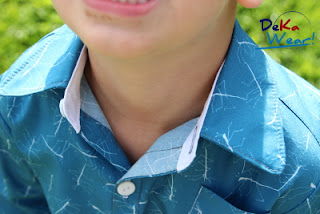
Bij dit patroon vind ik het altijd leuk om een accentstof te gebruiken. Ik leefde me wat minder uit als bij dit exemplaar. Voor de binnenkant van de manchetten, de staander van de kraag en de binnenkant van de schouderpas heb ik  een effen witte katoen gebruikt. Het leek me niet verstandig om deze kleur aan de buitenkant te gebruiken. Dat zou namelijk nooit lang wit blijven....

With this pattern I love to use accents in the fabric. I did use less of it this time, compared to this one. I used a plain white cotton on the inside of the cuffs, the collar stand and the inside of the back yoke. I didn't think it would be wisely to use this on the outside. It wouldn't be white for long then, wouldn't it?


Voor de maat gebruikte ik weer een stukje biaisband dat ik deze keer in de schouderpas verwerkte. Bij de post over de Jacob vroeg ik hoe jullie dat doen. Als je nog inspiratie zoekt, kijk dan eens hier en hier (check hier ook de reacties, daar staan ook nog ideeën tussen).

To label the size I used baistape again. This time I sewed it between the back yokes. I asked how you label the size in your sewed garment, in the post about the Jacob. When you're looking for inspiration on this, you can check it here and here (both are in Dutch but the pictures will do the talking).
 
Bij het doorstikken wisselde ik steeds van draad, wit op wit, blauw op blauw. Behalve bij de knoopsgaten, daar werd t blauw op wit en wit op blauw, en bij het zakje, dat stikte ik door met wit. Het stofje is trouwens heerlijk. Zacht, een beetje glad en staat heel netjes.

I changed thread while topstitching: white on white, blue on blue. Except for the button holes there it became blue on white and white on blue, and for the topstiching on the pocket, I used white. The fabric is lovely, by the way. Soft, a bit smooth and neat...
 
De outfit voor S is klaar. Een zeer verantwoorde outfit eigenlijk. Een gerecykleerde broek en een blouse in biokatoen (GOTS gecertificeerd). De stof voor de outfit van Z hangt aan de lijn te wapperen en het patroon is al uitgeknipt. Ik heb nog 2 weken om de boel in elkaar te zetten... Dat moet te doen zijn ;)
So, the outfit for S is finished. A very responseble outfit to be honest. Recycled pants and a shirt made of bio cotton (GOTS certified). The fabric for Z's outfit is fluttering on the clothesline now and the pattern is waiting. In 2 weeks it should be finished... That should be doable...


woensdag 28 januari 2015

Baby beanie met kreeftsteek - Baby beanie with crabstitch

Toen ik nog zwanger was maakte ik een beanie voor 'de baby'. Deze wordt inmiddels intensief gebruikt. Voor mijn neefje-of-nichtje-op-komst maakte ik al een paar slofjes. Het leek me leuk om daar een bijpassend mutsje bij te geven. Dus haakte ik een beanie in de zelfde kleuren.

When I was pregnant, I made a beanie for 'the baby'. By now this beanie is used a lot. For my nice-or-nephew-to-be I made booties before. I tought it would be nice to make a matching beanie with it. So I crochet a beanie in the same colors.


Ik gebruikte wel ander garen dan dat van de slofjes. De slofjes zijn gemaakt met Phil Thalasa, dat vond ik wel lekker breien maar niet lekker haken. Ik koos Phildar Super Baby. Dit haakte heerlijk weg. Het is een dun en super zacht garen. Dat gaat vast lekker zitten.

I didn't use the same yarn for the beanie. The booties are made of Phil Thalasa, which I like for knitting, but not so mutch for crochet. I chose Phildar Super Baby. I did crochet nice with it. The yarn is thin and super soft.

Ook deze beanie werkte ik af met een kreeftsteek. De vorige keer heb ik toch iets verkeerd gedaan, denk ik, want nu zag deze steek er anders uit en leek hij meer op de steek uit de instructievideo. Ik vind hem nu nog mooier en heb hem inmiddels al vaker gebruikt.

This beanie is finished with a crabstitch also. I think I did something wrong last time, 'couse now the stich looked different and more equal to the one in the instruction video. I like it even more now and used it more times now.


Gebruikt garen: Phildar Super Baby kleur 0025 crygne (wit) en 0149 flanelle (grijs)


Used Yarn: Phildar Super Baby color0025 crygne (white) and 0149 flanelle (gray)

donderdag 6 november 2014

Baby mutsje - Baby beanie

Nu ik minder naai en meer haak en brei, komen hier steeds meer haak en brei berichtjes te staan. Ik ben niet zo van de hele grote projecten. Mijn hoofd loopt namelijk al snel over van de ideeën en grote projecten kosten veel tijd. Zwanger zijn is ook een ideaal excuus voor kleine projectjes: baby-projectjes. Ik bedacht me dat ik geen warm mutsje heb voor de baby. Ik heb alleen van die katoenen mutsjes, maar die zijn (denk ik) niet echt warm genoeg voor buiten in de winter. Dus besloot ik deze te haken.

Eerst gebruikte ik Phildar Thalasa, die ik ook gebruikte voor deze slofjes. Maar het breit beter dan het haakt (of ik moet een grotere naald gebruiken?). Toen bedacht ik me dat dit katoen is, en misschien niet warm genoeg voor buiten. Daarom besloot ik te switchen naar restjes garen die ik nog heb liggen. Volgens mij is dit wol, of een mix van wol en acryl. In ieder geval lekker warm en het kriebelt niet!
Now I'm sewing less and crocheting and knitting more, you'll see more crochet and knit posts here. I'm not realy into the large projects. I soon have much ideas spinning in my head and large projects costs a lot of time. Being pregnant is a ideal excuse for making little projects: baby projects. I tought I needed a warm bonnet for the baby. I've only cotton bonnets, but they aren't warm enough for going outside in the winter (I think). So I decided to crochet this one.

I started using Phildar Thalasa, which I used to make these booties. It was fine yarn to knit with, but crocheting with it wasn't (or maybe I need to use a larger crochet hook?). Then I thought the yarn wouldn't be warm enough, becouse it's cotton. So I decided to change yarn and used leftovers. I think this is wool, maybe mixed with acryl. It is nice and warm and doesn't itch.

Ik heb ook maar meteen gevarieerd in het patroon. Wat waarom zou je het jezelf makkelijk maken als het ook moeilijk kan? ;) De laatste tour stokjes heb ik vervangen door een tour vasten (in paars) en een tour in kreeftsteek. Ik zag deze steek hier en vond hem mooi. Het leek me een mooie afwerking van dit mutsje. Het is niet een hele makkelijke steek, maar ik vind hem toch mooi gelukt, al hoewel ik niet zeker weet of ik het nu goed heb gedaan. (Hier een filmpje met de uitleg van de steek)


I also made a little variation on the pattern. Why make it easy on yourself if you can do it the hard way? ;) The last round of DC's I replaced with a round of SC's (in purple) and a round of crabstitches. I found that stitch here and liked it. I thought it would be a nice finishing for this beanie. The stitch isn't very easy, but I think it worked out fine, altough I'm not sure I did it right. (Here an instruction video for the crabstitch)

woensdag 24 september 2014

Tuniek - Tunic

Zwanger zijn en naaien dat gaat niet echt samen. Bij mij niet in ieder geval. Ik heb grootse plannen, alleen laat de uitwerking nogal op zich wachten. Toch heb ik in de laatste tijd wat kunnen maken: een tuniek, naar eigen patroon. Dat duurde sowieso lang, omdat ik eerst wat prototypes maakte. Ik ben uiteindelijk tevreden met het resultaat. Ik maakte hem naar mijn eigen (niet zwangere) maat. Maakte hem redelijk lang (tot halverwege mijn bovenbenen) en voorzag de zijnaden van een split. Zo pas ik hem ook in zwangere toestand! Handig.

Ik heb geen foto's van mezelf in de tuniek, dus je moet het even met een 'lege' tuniek doen.

Being pregnant and sewing doesn't work fine for me. I do have all kinds of plans, but it's going very slow. Despite that I could sew someting lately: a tunic, for which I drew the pattern by myself. This took more time than an average project, as I made some prototypes first. I'm pleased with the result at last. I made him after my own (not pregnant) size. The lenght is up to halfway my tigh and the side seams have splits. This way it fits even in pregnant state!

I don't have pictures of myself with the tunic, so you have to do it with an 'empty' tunic. 


De naden van de mouwen en de en de zoom stikte ik door met tweelingnaald. Ik gebruikte hiervoor garen in een contrasterende kleur (oranje). De mouwen zijn 3/4, ideaal voor het tussen seizoen en in de winter kan er nog een T-shirt  met lange mouwen onder.

The seams of the sleeves and the hem I stitched with a twin needle. I used a constrasting color (orange). The tunic has 3/4 sleeves, ideal for the 'in between season' and when Winter arrives I could wear a long sleeved T-shirt under it.


Er lopen nog wel wat naai-projectjes, maar dat gaat dus niet zo hard. Inmiddels heb ik het breien maar weer opgepakt, dat gaat wel als je zwanger bent. Ik zou ook graag eens willen kunnen haken, ik heb zoveel leuke haak-dingetjes gezien! Misschien is het een idee om mee te doen aan deze Crochet-a-long...? Nou, ja, als ik dan niet kan bloggen over naaiwerkjes, dan misschien over breiwerkjes... Wie weet :)

There are more sewing-project going on over here, but it isn't going very fast. In the mean time I picked up knitting again, that doable when pregnant. I realy would love to know how to crochet, I saw so many nice crochet projects! Maybe I could join this Crochet-a-long? Well, if I can't blog about sewing, maybe I can blog about knitting... Who knows :)

vrijdag 28 februari 2014

Nog een Bimaa - Another Bimaa

Toen ik jullie de eerste Bimaa die ik maakte liet zien, vertelde ik al dat de tweede ook al klaar lag. Nou, hier is ie dan hoor. Deze maakte ik uit een tricot dat ik kocht bij Het Stoffenhoedje in Zaamslag. Het is een dunne stof die in alle kanten rekbaar is (4-way-stretch). Ik koos weer voor de sjaalkraag variant, omdat ik de col variant meer voor een meisje vind en de zoon ook al genoeg capuchon sweaters heeft. Ook deze kostte mij weer zo'n 1,5 á 2 uur naaiwerk.

When I showed you the first Bimaa I made, I told you I already had made a second one. Well, here it is! This one I made from a knit I bought at a local fabric store. It's a thin 4-way-stretch. I did choose the shawl collar again, as I think the cowl neck is more a grily variant and the son does have enough hoodies already. This one also took me about 1,5 to 2 hours sewing.

Hij staat de zoon geweldig. Ik heb de lijnen van het voor en achterpand in elkaar door laten lopen. Ik ben erg blij dat dit is gelukt! :) En als de zoon dan in zijn groen-grijs gestreepte trui aan een grijze bar zit, met een groene muur op de achtergrond, dan heb je meteen de ideale opstelling voor een foto...

Again this Bimaa looks great on the son. I matched the lines on the front and the back. I'm very glad it worked out! :) And then the son is sitting at a gray bar, with a green wall in de background, in his gray-green-striped shirt: The ideal setting for taking a picture...

donderdag 20 februari 2014

Diesels tweede leven - Diesels second life

Mr. DeKaWear had een favoriete trui. Ik weet niet hoe oud die was, maar hij droeg hem al voor wij elkaar kenden (en we kennen elkaar al bijna 13 jaar...). 't Was er een van het merk Diesel. Een goed merk blijkbaar, aangezien hij al zo lang mee ging. Uiteindelijk begon hij te verslijten aan de ellebogen. En als je goed kijkt kan je zien dat de trui wel eens onder een tuinbroek is gedragen. De trui werd toegevoegd aan de stapel te recycelen kleding. Na alle projectjes voor de dochter, vond ik dat het nu tijd was voor een projectje voor de zoon. De Bimaa Sweater stond al een poosje op mijn 'to-sew-list'. En zij zei dat het naaien van zo'n sweater in een ochtendje gedaan was (met knippen en al). Dat gaf me het zetje dat ik nodig had. De oude Diesel leek mij de ideale stof voor een probeer-versie van de Bimaa. Ik koos voor de versie met de sjaalkraag.

Mr. DeKaWear had a favorite sweater. I don't know the age of it, but he wore it before we knew each other (and we know each other for almost 13 years now). The brand of the sweater was Diesel. I think it's a good brand, as it did live for such a long time. Finally it did get worn-out at the elbows. And, when you take a closer look, you could see the sweater has been worn under dungarees. The sweater did get a new home in the pile with clothes to be recycled. After sewing several projects for the daughter I tought it was time for a (few) project(s) for the son. The Bimaa Sweater was on my 'to-sew-list' for a while. And she said sewing one took about a morning  (including cutting out the pattern) That was the push I needed. The old Diesel had the ideal fabric for a trial version of the Bimaa. I choose the version with the shawl collar.   

Het naaien kostte mij ongeveer 1,5 tot 2 uur werk. Uit het achterpand van de oude trui, haalde ik een voor en achterpand voor de Bimaa. Uit de mouwen, haalde ik de stof voor de mouwen van de Bimaa. Hier werkte ik om de versleten ellebogen heen. De rest haalde ik uit het voorpand, daarbij de vale plekken vermijdend. Het is een mooie sweater geworden, vind ik. Het patroon is eenvoudig en goed te volgen. Ik gebruikte de maat 2 voor mijn 2-jarige peuter. Het past hem prima. De mouwen en het lijfje van de sweater zijn mooi lang. Ik vind het wel fijn als een sweater een wat langer model heeft en de rug goed bedekt. Het staat de zoon geweldig. Een tweede Bimaa zit ook al in elkaar, deze keer van een speciaal gekocht stofje. Die laat ik later nog zien! :)


Sewing the sweater did cost me about 1,5 to 2 hours. I cutted the front and back of the Bimaa out of the back of the Diesel. The sleeves I used to cut out the sleeves for the Bimaa, avoiding the worn-out elbows. The other parts I cut out of the front of the Diesel, avoiding the worn-out spots. I think the sweater turned out great. The pattern is easy to follow. I used size 2 for my 2-year old toddler. It fits great. The sleeves and body are nice long. I like it when a sweater has a long body which covers the back. It looks great on the son. A second Bimaa, made of a store-bought fabric, is already finished. I'll show this later! :)

vrijdag 13 december 2013

[Patroon review - Pattern review] Gerecycleerd Ethan shirt - Recycled Ethan shirt

Tijdens de recycle 14 daagse van Boomie ben ik begonnen aan een blouse voor de zoon. Helaas ging mijn naaimachine toen stuk, dacht ik. Toen bleek dat dit niet zo was, was de recycle 14 daagse al voorbij. Met een week vertraging was de blouse dan toch af. Toen kwam de volgende uitdaging: foto's maken van mijn creatie... Woensdag had de zoon de blouse voor het eerst aan, maar hij was niet echt in 'the mood' voor het maken van foto's. Met wat afleiding is het gelukkig toch nog gelukt :).

During Boomie's recycle 14 days, I started makeing a blouse for the son. Unfortunally I thought my sewing machine was broken. When I found out it wasn't, it was too late for the blouse being part of it. After all I finished the blouse with a delay of one week. After that came a new challenge: makeing pictures of this creation... Wednesday was the first time, my son did wear the blouse, but he wasn't realy in a picture-makeing-mood. With some distraction, I was able to make some pictures :). 

Omdat ik deze blouse niet meer kan gebruiken als bijdrage voor de recycle 14 daagse, besloot ik om er een Patroon Review van te maken. Dit is mijn eerste review, dus ik hoop dat ik het een beetje goed doe. :) Het patroon dat ik gebruikte is het Ethan shirt van Sis Boom, dat ik afgelopen zomer kocht als onderdeel van de Sew Fab Bundle. De beschrijving is Engelstalig en de afmetingen in inches. Engels lezen gaat mij beter af dan schrijven, dus dat was geen probleem. De afmetingen zette ik om in centimeters, ik had natuurlijk ook kunnen meten in inches, ware het niet dat mijn meetlint enkel centimeters bevat ;).

Becouse I couldn't use this blouse for the recycle 14 day's, I decided to make a Pattern Review of it. It's my first Pattern Review, so I hope I'll do it right :). The pattern I used is the Ethan shirt of Sis Boom. I bought this pattern as part of the Sew Fab Bundle, last summer. The description is in English, and the measurements are in inches. My reading in English is betther than my writing, so that wasn't a problem. I converted the mesurements to centimeaters. I could have measured in centimeters, of course, if only my tape-measure had centimeters and inches on it ;).

Wat echt geweldig is aan dit patroon, is dat het geschikt is voor jongens vanaf 1 jaar t/m 14 jaar. Aangezien de mijne bijna 2 is, kunnen we nog even voort ;). De patroon beschrijving is zeer uitgebreid. Welke maten je moet nemen staat beschreven, ook staat beschreven wat je moet doen, als je geen maten kan nemen (bijvoorbeeld als je het shirt cadeau doet). Elke leeftijd (in jaren) heeft zijn eigen maat. Per maat kan je het voor- en achterpand en de mouwlengte laten variëren in lengte. Dit staat allemaal duidelijk beschreven.


The pattern is suiteble for boys in the ages 1 untill 14 years. I think that's realy great! My little boy almost turns 2 years, so I can use this pattern for a while ;). The pattern description is very detailed. It describes which sizes you need and how to measure them. It also explains what to do, when you can't take measures (for example, when the shirt is a gift). Every age (in years) has his own size. Per size you can differ the length of the front, back and sleeves. All is very well explained.

De beschrijving voor het naaien van het patroon is ook erg duidelijk. Alles wordt stap voor stap uitgelegd en ondersteund met plaatjes. Over het gebruik van een lijmstift als hulp bij het vouwen en naaien, had ik hier al eens gelezen. Bij het maken van deze blouse heb ik dit voor het eerst toegepast. En het beviel echt heel goed! In het patroon wordt regelmatig uitgelegd wanneer en hoe je dit moet toepassen. Het geeft een heel mooi resultaat.

The description of how to sew the shirt also is very clear. It's all explained step by step and every step is supported by a picture. I read about using a gluestick when sewing before overhere. I applied it the first time, sewing this shirt. It works realy great! The description regulary explains when and how to apply this trick. It gives a realy great result.

Al met al ben ik heel tevreden over dit patroon. Het is vrij eenvoudig in elkaar te zetten, mede dankzij de duidelijke uitleg. Het eindresultaat mag er zijn. De achterkant is wat langer dan de voorkant, en de kraag is prachtig! Ik vind kleine details aan kleding altijd erg leuk, daarom maakte ik één knoopsgat oranje. Dat was ook zo, toen de blouse nog van mijn vader was, en dat vond ik een leuk detail om terug te laten komen. Wat ik een volgende keer wel anders zou doen, is het voor- en achterpand langer maken. Maar dat is iets wat ik zelf niet goed heb ingeschat, dit ligt niet aan het patroon. De manchetten zijn wel wat smal, voor mijn ventje. Deze moet ik een volgende keer wat ruimer maken, want nu kunnen ze niet dicht. Wat op zich ook weer geen probleem is, want als dit wel kan, zitten ze ook niet altijd dicht. Het lijkt me ook erg leuk om het patroon van deze blouse te transformeren naar een blouse voor mijn dochter.

I'm realy satisfied with this pattern.It's fairly simple to put the shirt together, thanks to the clear explanation. The result is great. The back of the shirt is a bit longer than the front, and I realy love the collar! I like little details on clothing, so I made one orange button hole. Back in the days, when this blouse belongs to my father, it also had an orange button hole, and I wanted this little detail to come back in the shirt for my son. Next time, I'll enlarge the front and back of the shirt. This is something I misjudged and isn't an error in the pattern. For my little chap, the cluffs are a bit small. I have to make those a bit wider next time, becouse I can't close them now. That isn't realy a problem, 'couse when it is possible (on an onther shirt) they aren't always closed eighter. I like the idea of changeing the pattern a bit, to make a shirt for my daughter of it.

En dan hier nog even de 'voor' foto - Here the 'before' photo

Patroon: Ethan shirt van Sis Boom 
Stof: Oude blouse van de (o)pa

Pattern: Ethan shirt of Sis Boom 
Fabric: Old shirt of the (grand)dad 

zaterdag 19 oktober 2013

Groeispurt - Growth spurt

Ineens was de dochter uit haar kleren gegroeid. Echt... uit alle kleren. Broeken stonden op hoogwater, haar hemd piepte onder haar truitjes uit... Dat kon niet meer. Dus zorgde ik voor een nieuwe garderobe. Nee. Ik heb niet alles genaaid, zo snel kan ik niet naaien. De meeste dingen heb ik gekocht. Maar toen ik in de winkel Burda Kids 2013 zag en daar weer leuke patroontjes, vond ik een leuk project voor haar nieuwe garderobe. Een tuniek.


From one day to another the daugher did grow out of her clothes. Realy... all clothes. Pants and sweaters suddenly were to short... She realy needed new clothes. So I got her new clothes. No. I didn't sew it all, I'm nog quick enough for that. Most clothes I bought. But when I discoverd Burda Kids 2013 and found some nice patterns, including a nice project for her new wardrobe. A tunic.

Wat ik er vooral zo leuk aan vind, is dat hij aan de zijkanten in een punt loopt en dat hij zakken heeft aan de voorkant (dat laatste ook tot grote vreugde van de dochter).


What I like on this pattern are the sides and the pockets on the front (the pockes are making this tunic one of the daughers favorites).

De halsrand heb ik afgewerkt met twee kleuren in de tweelingnaald. Groen en roze.
I finished the neckline with a twinneedle, with two different colors. Green and pink.


Verder ben ik hier en daar wat van het patroon afgeweken. Om te beginnen heb ik de zakken gemaakt van restanten van het roze project, dat steekt mooi af bij de overige stof. Voor de biezen van de zakken heb ik boordstof van dat zelfde project gebruikt.
I made some adjustments to the pattern. First I used scraps from the pink project for the pockets and the piping of the pockets.

De mouwranden en de onderrand van de tuniek moesten niet afgewerkt worden. Dat vond ik maar niets. Daarom korte ik de mouwlengte iets in, en werkte ik de mouwen af met een stuk boordstof. Ik ben zeer tevreden over het resultaat. Het ziet er comfortabel uit.
The sleeve edges and the lower edge of the tunic didn't need to be finished. I din't like that. So I shortened the sleeve lengths and added some knit fabric (boordstof in Ducht, I don't know the English word for this...) as finishing. I'm glad with the result. It looks very comfortable.


De onderrand van de tuniek heb ik afgewerkt met een tweelingnaald, met de zelfde kleuren als de halsrand. Ik moet alleen echt leren iets rechter te naaien. Verder ben ik tevreden met het resultaat. En de dochter ook :)


The lower edge of the tunic I finished with a twinneedle, with the same colors as the neckline. I realy should learn to sew more straigt. Overall I'm happy with the result. And the daughter is too :).

Update
Ik zou het bijna vergeten... Van de restjes maakte ik een bijpassende haarband. Voor de afmetingen gebruikte ik een haarband van de dochter. Toen ze de 'oude' haarband pakte merkte ze op: hé deze is even groot! Ja.. die houd je dus echt niet voor de gek ;).

I almost forgot... From the scraps I made a matching braid. For the measurements I used a braid from the daughter. When she took the 'old' braid she noticed: this one is as big as my new one! Yeah.. you can't fool her ;).


zaterdag 28 september 2013

Cadeau - Present

Vandaag bracht ik een verjaardagsbezoek aan een (net) 2-jarige. Deze dame is een maand geleden grote zus geworden. Voor de baby had ik al een cadeautje klaar liggen. Een badcape...


Today I visited a birthdayparty of a two-year old. A month ago this girl became a big sister. For her baby-sister I already made a present. A bathcape...

... die ook als verschoningsmat kan dienen, omdat er vakjes in gemaakt zijn voor billendoekjes en luiers. (ik ben bezig met een tutorial voor deze cape)


...which can be used as a nurserymat, as it has pockets for wipes and diapers. (I'm writing a tutorial for this cape)

Het leek me leuk om voor de grote zus ook iets te maken, met het zelfde stofje als de buitenkant van de cape. Ik heb lang getwijfeld wat dan. Want smaken verschillen en naar de maat kon ik alleen maar gissen. Uiteindelijk maakte ik een omkeerbaar A-lijn rokje. Aan de ene kant gebruikte ik een jeansstof...

 
I tought it was nice to make someting with the same fabric for the big sister. For a long time, I doubted what to make. Becouse tastes differ and I had to guess for the size. Eventually I made a reversible A line skirt. It has a denim fabric on one side... 
 
... en aan de anderekant het bewuste stofje. Voor de tailleband gebruikte ik een stukje roze tricot die over was van 'Het Roze Project'. De maat (92) was goed gegokt, en de cadeaus vielen goed in de smaak!


...the other side is the same fabric as is used in the cape for the baby sister. The waisband is made from a scrap from 'The Pink Project'. The size (92 [= 2T]) was the right size, and the girls (and the mom) liked the presents. 

Beide projectjes werkte ik af met een roze paspel. Eigenlijk was ik op zoek naar een 'gewone' roze paspel, maar de fournituren winkel had alleen een paspel met een kantje. Ik kocht hem toch maar, en heb er absoluut geen spijt van. Is-ie niet schattig? :)


Both projects I finished with pink piping. Actually I was looking for 'normal' piping. But at the suppliesshop they only had this pink piping with lacing. Nevertheless I bought it, and I don't regret it. Isn't it cute? :)

Patroon badcape: Eigen idee (tutorial volgt)
Patroon rok: A-lijn uit Allemaal Rokjes, naar eigen inzicht omkeerbaar gemaakt
Badstof en Danseressenstof: Gekocht bij Modecafé Terneuzen
Danseressenstof is Dapper 2141-5N

Pattern bathcape: An idea of my own (tutorial will follow)
Pattern skirt: A linke skirt from Allemaal Rokjes, made revirsible to own insight
Terry and dancers fabric: Bought at Modecafé Terneuzen
Dancers fabric is Dapper 2141-5N

LinkWithin

Related Posts Plugin for WordPress, Blogger...