Posts tonen met het label Zonen09. Alle posts tonen

zaterdag 30 juli 2016

Zonen09 Bas Hack

Ik zeg niet zo snel dat ik ergens trots op ben. Maar nu ga ik het toch zeggen... Op het resultaat van dit project ben ik best trots. Een sneak peek kon je hier al zien (laatste foto). Het resultaat was precies zoals ik het in mijn hoofd had, en ik heb er best wat aan gepuzzeld. Hoewel ik van de snel klaar projectjes houd, geven projecten die wat meer gepuzzel en energie vragen ontzettend veel voldoening, als het allemaal lukt. Dat was hierbij het geval.

S had nood aan korte broeken. Ik ben fan van Zonen09 patronen, en de Bas vind ik helemaal geweldig. Hier zie je mijn eerste Bas. De details doen 't m echt bij dit patroon. En nu had ik een normale korte broek in mijn hoofd, gebaseerd op Bas. Dus. Meestal doe je zoiets andersom geloof ik, van een gewone broek een tuinbroek maken. Maar ik ben altijd een beetje anders ;). Ik maakte eerst een proef exemplaar, paste nog wat aan en ging meteen door 'voor het echt'.

I'm not someone who says she is proud on something she did. But now I do... I'm quite proud with the results of this project. I showed a sneak peek before (last picture). It turned out exacly as I had in mind, despite the puzzling it took. I do love quick sew project, but the projects that take more puzzling, and more energy, but turn out the way you had in mind, give much satisfaction. This was just such a project.

S was in need of some shorts. I'm a fan of the Zonen09 patterns. Bas is my favorite. I blogged about my first Bas here. I realy love the details of this pattern. I had shorts in my mind, based on the Bas pattern. So. Normal people turn trousers into dungerees. But I'm not normal I suppose, I turned a dungeree into shorts. I made a prototype first, made some adjustments and made the real one after that. 
 

Wat er natuurlijk in moest waren de plooien in de pijpen aan de voorkant. Maar ook de lusjes waar bij de echte Bas de schouderbanden door horen te gaan. Rond de tailleband maakte ik ook lusjes, waar eventueel een riem door zou kunnen lopen. Ook maakte ik een nep gulp. Ik spiekte hiervoor even bij het Jacob patroon. Ik vergat er een foto van te maken, maar op onderstaande foto kan je het een beetje zien.

Of course the folds had to be added to this version of Bas. But also the loops which are for the shoulderbelts in the real Bas. I added little loops around the waistband, so we could use a belt if necessary.  I also added a fake zipper. I cribbed at the Jacob pattern for this. I forgot to take a proper picture of it, but in the picture below you could see it.


En een jongensbroek kan natuurlijk niet zonder zakken. De vorm van de zakken baseerde ik op de overgang van de broek naar het voorpand in de echte Bas, om zoveel mogelijk van de details van het originele patroon mee te nemen.

Boys pants needs pockets. I based the shape of the pockets on the transition of the pants to the body in the real Bas pattern.
 

Aan de achterkant van de broek verwerkte ik verstelelastiek in de tailleband. En ook hier komen bekende details terug.

At the back I added adjustable elastic in the waistband. And also some known details of the Bas pattern.
 

Een van de geweldige details van de Bas zijn de schouderbanden die vanuit de zijnaad starten. Dit heb ik teruggebracht in deze broek. De lusjes heb ik er wel anders overheen geplaatst dan in het originele patroon, zodat er eventueel riem door zou kunnen. Ze zijn echt functioneel dus ;)

One of the most great details of the Bas are the shoulderbelts, which start form the side hem. This detail was added to my shorts. The loops are placed differently so we're able to pull a belt trough if nececcary. 

Ik probeerde de 'schouderband' op het zelfde punt te laten starten  als de zak. Dat is bijna gelukt :)

I tried to place the 'shoulderbelt' at the same point as the pockets on the front. I almost made it :)


Ik gebruikte de markering van de kniehoogte op het patroon als kniplijn. Ik wilde namelijk dat de broek tot op de knieën zou komen. Dat lukte perfect! En om de Zonen09 look af te maken, is de broek gemaakt uit een restje Stickly Rockers, waar ik vorig jaar een Zonen09 outfit mee maakte :)

I used the knee mark on the pattern as cutting line. Becouse I wanted the shorts to be at knee length. This worked out just fine! And to finish the Zonen09 look, I made these shorts with a left over of Stickly Rockers, which I used to make an other Zonen09 outfit last year


Patroon: Een Hack van de Bas - Zonen09

donderdag 21 juli 2016

Billie Trio

De afgelopen tijd heb ik best wat genaaid, maar weinig geblogd. Ik ga eens een poging doen dit in te halen... Een van de projecten was wat Billie bandwerk. Normaal gezien houd ik niet zo van bandwerk. Maar Billie is een veelzijdig patroon, waardoor ik drie heel verschillende Billies achter elkaar kon produceren. Eentje voor Y en twee voor S.

I've been quite productive on the sewing part, but quite behind on the blogging part lately. I'll try to catch up... One of the projects was some Billie line work. Normally I don't like line work. But Billie is a versatile pattern, so I could sew three completely different Billies in a row. One for Y and two for S.

Het oranje shirtje is een exemplaar voor Y. Dit is de meest eenvoudige versie van de drie geworden. Gewoon recht toe - recht aan, mouwen en lijf omgezoomd en een eenvoudige halsboord. Het stofje kocht ik vorig voorjaar op een stoffenmarkt.  Het is een vrij fel kleurtje, wat niet helemaal tot z'n recht komt in deze foto's. Ik gebruikte het stofje vorig jaar voor een jurk voor Z. De felle kleur komt in die foto's beter tot z'n recht. Aan-foto's van een bewegelijke 1,5-jarige maken is lastig en helaas voor dit shirt niet gelukt.

The orange shirt is the one for Y. This was the most simple one of the three. Just, straight on, hemmed the sleeves and the body and made a simple neckband. I've bought the fabric on a market last year. The colour is quite bright, these pictures do not do justice to the color. I used the same fabric last year for a dress for Z. The brightness of the colour is more visible in those pictures. Pictures of little Y wearing the shirt are difficult to make. This time it didn't work out sadly, so no pictures of a cute model wearing a nice shirt ;)
 

Voor S maakte ik een versie in legerprint en in de stof Ride a Bike van Poppy. Beide stofjes kocht ik bij Stoffenfeest.

For S I made a version in armyprint and a version in the fabric Ride a Bike by  Poppy. Both fabrics are from Stoffenfeest.
Het legershirt werd gewoon omgezoomd en kreeg een eenvoudige halsboord.

The army shirt has a simple hem and a simple neckband.


De mouwen zoomde ik om met de verkeerde kant naar buiten, dat vond ik voor dit shirt een leuk effect hebben.

I hemmed the sleeves with the wrong side out, for a sturdy look on this shirt.
 

Tijdens het naaien besloot ik dat de zijnaad dan een Franse naad moest worden, zodat je geen onafgewerkt randje zou zien bij de mouw. Hiervoor gebruikte ik deze tutorial. Ik had de stof echter al geknipt, zonder de extra benodigde naadwaarde. Ik maakte de naad dus wat smaller. Het shirt zit nu iets strakker. Maar doordat de stof vrij dun en zeer rekbaar is, is dat geen probleem.

While sewing I decided to make a fench seam from the side seam, so there wouldn't a unfinished edge be visible on the sleeve. I used this tutorial (here an English tutorial). The fabric was cutted already, without the extra seamallowence. So I made the seam a bit more narrow. The shirt has a tighter fit now, but this isn't a problem as the fabric is thin and verry strechy. 
 

Het shirt met de fietsjes heeft de meeste details gekregen.

The bicycle shirt has gotten the most details.
 
Hierbij naaide ik de boorden aan de mouwen en de hals aan als biasband, wat ik doorstikte met een tweelingnaald. Als boordstof gebruikte ik de zelfde stof, alleen gebruikte ik de verkeerde kant aan de buitenkant.

I finished the sleeves and neckline with a band like it was biaistape. And top stiched them with a twinneedle. I used the wrong side of the bicycle fabric for them.
 

Eerlijk gezegd vind ik deze afwerking van de boordjes het mooiste. Dit ga ik vaker doen, denk ik.

I like this way of finishing the hems, I think I would do this more often.


Dit shirt kreeg ook een zakje, waar S het liefst van alles in zou stoppen... Ook hiervoor gebruikte ik de verkeerde kant van de stof als buitenkant.

I added a pocket to the shirt. S would put the world in it, if he had the change... Here it's also the wrong side of the mainfabric you see.
 

Goed... dan is het nu tijd voor de aan foto's van de shirts voor S. Hij speelde toevallig net modeshowtje met Z, dus dat kwam mooi uit... :)

So... time to show some pictures of the t-shirts on the model. S was playing fashion show with Z, so I could play the photographer... :)
 
 Een echt model...

He realy is a model...


En hieronder heb je alvast een sneak peek van mijn volgende projectje: een Bas-hack. Hierover later meer...

And down here a sneak peek of the next project: a hack on the Bas pattern. More of this later...


Patroon: Billie, Zonen09
Stof: Oranje: stoffenmarkt, Legerprint: Stoffenfeest, Fietsjes: Ride a Bike by Poppy, Stoffenfeest

Pattern: Billie, Zonen09
Fabric: Orange: market, Armyprint: Stoffenfeest, Bicycles: Ride a Bike by Poppy, Stoffenfeest

zaterdag 28 mei 2016

Big yellow taxi

Toen ik de naamslinger maakte had ik dit liedje in m'n hoofd (ja erg he, ik weet t). Toen ik de Billies uit deze post maakte, had ik dit liedje in m'n hoofd (das al een stuk beter :) ). Van de (taxi) stof kocht ik vorig jaar 2 meter. Toen ik besloot hiervan een Billie voor S te maken, bedacht ik dat ik er ook wel eentje voor neefje M kon maken. Ik heb nu nog 1,5 meter over... :D

When I was making the name garland, I had a Dutch song in my mind. When I was working on the Billies in this post, I had this song in mind (which is much better than the first, to be honest :) ). Last year I've bought 2 meters from the taxi fabric. When I decided to make a Billie out of it for S, I wanted to make one for nephew M too. I still have 1,5 meters left now... :)


Zoals ik al zei, puilt de kast van Z uit met kleding en kan S nog wel wat gebruiken. Dus worden er vooral jongens projectjes genaaid momenteel. Eigenlijk best leuk. En wat ook leuk is, is dat S er (ook) elke keer heel enthousiast op reageert. Hij loopt er echt overal mee te pronken. Hé juf, kijk eens ik heb een nieuw T-shirt! Heb mama gemaakt! :)
As I said before, Z has more than enough clothes, unlike S who could use some more. So I'm sewing mainly boys projects now. And I'm enjoying it. What realy is fun, are S entousiast reactions on what I make him. And he's showing off the stuf I make him too :). Hey, look! I've a new T-shirt! Mommy's made it for me! :)


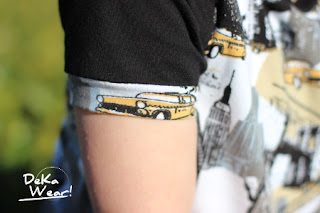
Voor S maakte ik een Billie met raglanmouw, voor neefje M met enveloppehals. Bij de kleine maatjes ben ik altijd bang dat het hoofd er niet door gaat passen, bij een 'normale' halsopening. Misschien onterecht, maar better safe than sorry. Beide shirts zoomde ik 'normaal' om, de mouwen werkte ik af met een stukje van de taxi stof. En dat pakte leuk uit bij het shirt van S. :)

I made a Billie with raglansleeve for S, and one with an enveloppe neckline for nephew M. With those small sizes I'm always afraid the head won't fit trough a 'normal' neckline. Maybe unfairly, but better safe than sorry. I used a 'normal' hem on both shirts. The sleeves are finished with a piece of taxi fabric. Which ended up very funny in S's case. :)


Voor S maakte ik een maat gewone maat 104. M is een lange, slanke baby (nou ja, peuter inmiddels). Daarom maakte ik voor hem een smalle maat 86. Beide shirts passen mooi, maar toch had ik ze liever nog wat langer gehad. Volgende keer iets meer zoom aanknippen denk ik.

I made S a normal size 4. M is a tall, skinny baby (well toddler in the mean time). So I've made him a size 18 months small. Both shirs fit nice, but might have been a little longer. Something to remember for next time.


Patroon: Billie Zonen09
Stof: Taxi's gekocht op een stoffenmarkt - Zwarte tricot gekocht bij Het Stoffenhoedje

Patroon: Billie Zonen09
Stof: Taxi's bought at the market - Black tricot bought at Het Stoffenhoedje

woensdag 17 februari 2016

Wat je voor je kinderen over hebt - The things we do for our kids

Ik kocht twee jaar terug spot goedkoop een lap zwarte ribfluweel en wist meteen wat ik daarvan zou maken: Een Bas voor S. Door allerlei oorzaken werd dit project steeds weer uitgesteld, maar nu is het er toch eindelijk van gekomen.

Two years ago I had a cheep buy with a piece of corduroy. I immediatly knew what I would make with it: A Bas for S.The project was delayed, but finished now eventually.


Ik ben fan van de Zonen09 patronen, ik houd van de retro-look in een modern jasje. Hoewel ik er nog niet veel genaaid heb (1 Jacob en 1 Bas) bewonder ik de patronen al langer. Het komt er gewoon niet altijd van ze te maken. Billie ligt inmiddels ook al te wachten, maar dan eigenlijk eerst voor de zussen.

I'm a fan of the Zonen09 patterns. I like the retro-look with a modern twist. Despite I didn't sew much of  them (1 Jacob and 1 Bas), I admire them for a while now. There are just always other projects that seem to get more priority. Billie is waiting next, but that would be for one of the sisters first, I think.


In tegenstelling tot Jacob, die zo in elkaar zat, vraagt Bas wat meer geduld. Ik moest zelfs rijgen! En, echt, daar heb ik sinds ik leerde naaien een bloedhekel aan. Maar je hebt veel over voor je kinderen, zelfs dit. Hoewel ik nu al bedenk hoe ik de volgende keer onder het rijgen uit kan komen. Ik had me voorgenomen alle stappen keurig te volgen, om zo tot een mooi eindresultaat te komen. En ik vind dat dat is gelukt.... OK ik had Bas even moeten strijken voor hij op de foto ging, maar daar kunnen jullie toch wel doorkijken hè? ;)

In contrast to Jacob, which was a quick sew, Bas needs more patience. I even had to thread (by hand)! And, I hated that when I learned to sew and I still do. This is one of those things you do for your kids, I guess. But I'm thinking of a way to skip the threading next time. I intended to follow the instructions step by step, to get a nice end result. I think this was succesful... OK, I had to iron Bas before taking pictures, but you can see trough that, don't you? 


Ik houd van de details, zoals de kruislinkse banden, die vanuit de zijnaden van de broek starten.

I realy love the details, like the crosswise shoulder belts, which start in the side seam.


Of de verborgen binnenzak! Noot aan mezelf: Let op dat je strijkijzer het klittenband niet raakt! (Tja...)

Or the hidden pocket! Note to myself: Don't toutch the velcro with the iron! 


Ook al wilde ik me braaf aan de instructies houden, toch is me dat niet helemaal gelukt. De tuinbroeksluiting die ik in gedachten had paste niet door de lusjes bovenaan de broek. Gelukkig dacht de mevrouw van de stoffenwinkel goed mee en zij kwam met bretelsluitingen. Prima! S kan de broek zo ook makkelijk zelf aan en uit krijgen. De tassenband die ik gebruikte is waarschijnlijk wat te dun, de schuifgesp kwam steeds naar beneden gezakt. Dit heb ik opgelost door hem met een klein draadje vast te zetten (jaja met-de-hand).

Altough I wanted to be nice and follow the instructions, I didn't fully follow them. The buckles I had in mind didn't go trough the loops on the dungaree. The lady in the fabric store was very helpful and came up with these suspender buckles. Great! S can put this dungarees on easialy. The tape I used for the shoulder belts is to thin, I guess. The slide came down while wearing this dungarees. So I secured the belt with a little stitch (yeah, by hand...).


S wilde zelf niet op de foto, maar het is me toch gelukt ;). Ik maakte de broek in maat 98 voor de breedte en 104 voor de lengte. Dat was met het overnemen van het patroon soms wat puzzelen, maar ik ben blij met deze keuze. Hij sluit netjes aan en geeft nog wat ruimte om te groeien. S is heel blij, hij noemt 'm zijn werkbroek. Misschien ga ik er toch nog een voor 'm maken. Eens kijken hoe ik onder het rijgen uit ga komen. En ik gebruik dan geen tassenband meer voor de schouderbanden.

S didn't want me to take a picture of him with his Bas, but I did ;). I made Bas in size 3 width and size 4 length. While transfering the pattern I had to puzzle a bit, but I'm happy with the result. It fits nice and has some room to grow. S is very happy with his Bas and calls it his working trousers. Maybe I make an other one for him. Just see how I can skip the threading... And I won't use this tape for the shoulder belts.


Patroon: Bas - Zonen09
Stof: tweedehandswinkel

Pattern: Bas - Zonen09
Fabric: Thriftstore

woensdag 9 september 2015

Zonen09 Outfit

Binnenkort vieren mijn zusje en haar man hun bruiloft. Toen ik voor S de Jacob maakte, besloot ik voor hem en de grote zus een complete outfit te maken voor de bruiloft. De Jacob zou gecombineerd worden met een Ethan shirt. De stof voor dit shirt werd een ontwerp van Zonen09: Stickly Rockers. Vandaar dat de complete outfit een beetje een Zonen09 outfit is geworden.

In a few weeks my sister and her husband celebrate their wedding. When sewing the Jacob for S I decided to make S and his big sister a outfit for the wedding. The Jacob should be combinded with a Ethan shirt. The fabric for this shirt became Sticly Rockers, a design by Zonen09. That's why the outfit became a little bit a Zonen09 outfit.


For the record: Ik had deze blouse dus netjes gestreken, alvorens er foto's gemaakt gingen worden. Maar S besloot dat zijn eerste pose een gehurkte pose zou zijn. Schattig hoor, maar wel meteen de blouse in de kreukels natuurlijk...

For the record: I did iron the shirt before the photoshoot. I didn't count on S who thought it would be nice to squat for his first pose of the shoot. Adorable, but it wrinkled the shirt of course...


Ik maakte een maat 3 voor de 3,5 jarige. Voor de mouwen en de panden gebruikte ik de een na langste maat van het patroon. De mouwen hadden misschien nog wel een maat (één inch) langer gemogen. Maar aan de andere kant zijn ze nu precies lang genoeg. De manchetknopen van blousejes gaan bij S nooit dicht. Het past wel (net) maar we hebben er gewoon allebei het geduld niet voor denk ik :).

I sewed up a size 3 for our 3,5 year old. I used the second longest size for the sleeves and the body. I think I could use the longest size (1 inch taller). On the other hand, the sleeves are exactly long enough now. The buttons on the cuffs never close when S wears them. It does fit (just), but we both don't have the patience for it, I guess... ;)


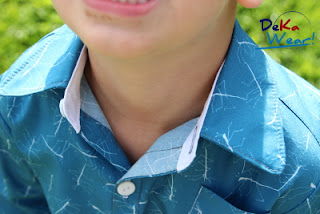
Bij dit patroon vind ik het altijd leuk om een accentstof te gebruiken. Ik leefde me wat minder uit als bij dit exemplaar. Voor de binnenkant van de manchetten, de staander van de kraag en de binnenkant van de schouderpas heb ik  een effen witte katoen gebruikt. Het leek me niet verstandig om deze kleur aan de buitenkant te gebruiken. Dat zou namelijk nooit lang wit blijven....

With this pattern I love to use accents in the fabric. I did use less of it this time, compared to this one. I used a plain white cotton on the inside of the cuffs, the collar stand and the inside of the back yoke. I didn't think it would be wisely to use this on the outside. It wouldn't be white for long then, wouldn't it?


Voor de maat gebruikte ik weer een stukje biaisband dat ik deze keer in de schouderpas verwerkte. Bij de post over de Jacob vroeg ik hoe jullie dat doen. Als je nog inspiratie zoekt, kijk dan eens hier en hier (check hier ook de reacties, daar staan ook nog ideeën tussen).

To label the size I used baistape again. This time I sewed it between the back yokes. I asked how you label the size in your sewed garment, in the post about the Jacob. When you're looking for inspiration on this, you can check it here and here (both are in Dutch but the pictures will do the talking).
 
Bij het doorstikken wisselde ik steeds van draad, wit op wit, blauw op blauw. Behalve bij de knoopsgaten, daar werd t blauw op wit en wit op blauw, en bij het zakje, dat stikte ik door met wit. Het stofje is trouwens heerlijk. Zacht, een beetje glad en staat heel netjes.

I changed thread while topstitching: white on white, blue on blue. Except for the button holes there it became blue on white and white on blue, and for the topstiching on the pocket, I used white. The fabric is lovely, by the way. Soft, a bit smooth and neat...
 
De outfit voor S is klaar. Een zeer verantwoorde outfit eigenlijk. Een gerecykleerde broek en een blouse in biokatoen (GOTS gecertificeerd). De stof voor de outfit van Z hangt aan de lijn te wapperen en het patroon is al uitgeknipt. Ik heb nog 2 weken om de boel in elkaar te zetten... Dat moet te doen zijn ;)
So, the outfit for S is finished. A very responseble outfit to be honest. Recycled pants and a shirt made of bio cotton (GOTS certified). The fabric for Z's outfit is fluttering on the clothesline now and the pattern is waiting. In 2 weeks it should be finished... That should be doable...


maandag 31 augustus 2015

Mijn eerste Jacob - My first Jacob

Ja, ik weet het: ik loop hopeloos achter. Toen ik twee jaar geleden mijn eerste stappen in de wereld van de naai-blogs zette ontdekte ik al snel de Jacob. Ik vond het een mooie broek en wilde die wel maken. Nu is het dan eindelijk zo ver: Mijn eerste Jacob is een feit. Ik gebruikte hiervoor een oude positiebroek (mijn favoriete, eigenlijk). Deze was aan de tailleband en het verstelelastiek versleten. De stof is zacht en dun. Ideaal voor een herfstbroek dacht ik zo.

I know, I'm way behind. When I made my first steps into the world of sew-blogs, soon I discovered the Jacob. I liked this pants and wanted to make a pair of them. And now I finaly did: My first Jacob is there as a fact. I used the fabric of old maternety pants (my favorite ones, actualy). These where worn out at the waistband and the adjustable elastic. The fabric is soft and thin. Ideal for a pair of autumn pants, I think.


Ik maakte de makkelijkste variant: Zonder gulp en zonder zakken. Zonder gulp omdat dit niet uit de breedte van de stof kon. Zonder zakken omdat ik dat niet mooi vond bij deze stof. Ik heb nog een paspelzak overwogen, maar heb ook dat idee laten varen. (Ondanks dat ik de makkelijkste variant maakte, maakte ik toch nog hier en daar een foutje. Maar daar hebben we het verder niet over ;) ) Tegenwoordig schrijf ik de maat van het kledingstuk op een stukje baisband dat ik in het kledingstuk verwerk. Deze keer naaide ik het tussen de tailleband. Zet jij de maat in kledingstukken die je maakt? Hoe doe jij dat?

I made the most easy one: Without fly and without pockets. Without fly, becouse I didn't have enough fabric width. Without pockets becouse I didn't like them in combination with this fabric. I did think of making a piping pocket (not sure this is the correct translation), but eventualy I put this idea aside. (Altough this was the easiest variant of the pants I did make some mistakes. We won't talk about that... ;) ) Currently I sew in some biaisband in the clothes I make and write the size of the garment on it. This time I sewed it in the waistband. Do you mark your garment with the size? How do you do this?


O, ja, de broek is voor S. Hij is er heel blij mee. Hij noemt hem zijn nieuwe lange korte broek. Vraag me niet hoe hij daar nu weer bij komt. Foto's maken van een 3,5 jarige (jongen) is niet evident. Hij stond er op dat hij zijn klompen zou dragen. Staat lekker charmant, maar hij staat er op.

O, the pants are for S. He is very happy with his pants. He cals them his new long shorts. Don't ask where that's comming from. Taking pictures of a 3,5 years old (boy) isn't very easy.He insisted to wear his woodenshoes. Very charming, but it sure did help taking the pictures.


De Jacob is een heerlijk patroon. De broek zat vrij vlot in elkaar. Voorlopig staan er nog wat andere (naai)projectjes op de planning, maar ik wil deze broek zeker nog eens maken.

Jacob is a nice pattern. It came together very quickly. I have some other projects planned right now, but I'll make this pants again.


Stof: Gerecykleerde Positiebroek
Patroon: Jacob - Zonen09

Fabric:Recycled maternaty pants
Pattern: Jacob - Zonen09

LinkWithin

Related Posts Plugin for WordPress, Blogger...